
Documentation
Documentation in Digital Technologies
| Key Element | The Goal | What to Do |
|---|---|---|
|
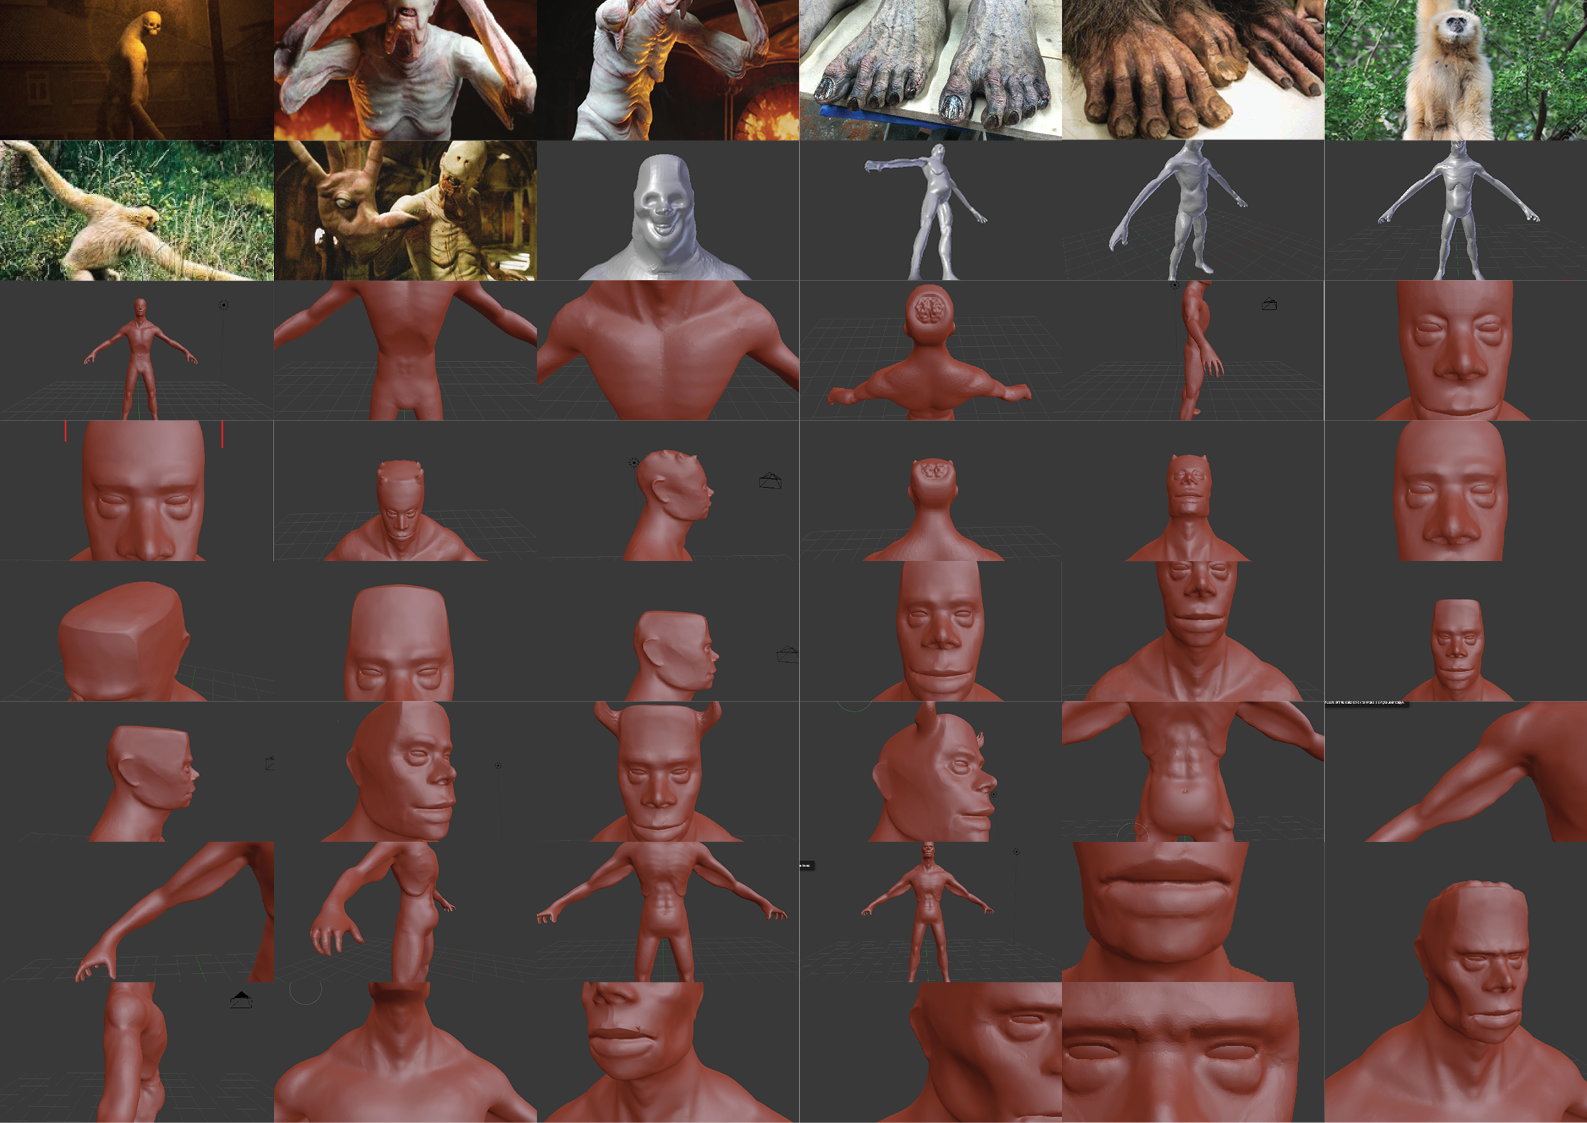
1. Show Your Progress (The Iterative Process) |
Assessors want to see the messy journey, not just the final polished project. | Take regular screenshots of your early drafts—like your initial 3D block-outs or basic code logic. Whenever you make a major update, write down exactly what you changed and why. |
 |
||
|
2. Explain Why You Did It That Way (Complex Tools & Techniques) |
When using advanced software, you need to prove you understand your own workflow. | Explain your choices. If you are saving time by using modular kitbashing in Blender or starting with a base-mesh generator, document it. Explain why it is a smarter, more efficient way to work than starting from scratch. |
| [Insert Example Image of Complex Tools/Workflow Here] | ||
|
3. Prove You Listened to Your Users (UX & Feedback) |
Designing a great digital outcome means designing it for real people. | Have people test your game level, app, or website. Write down exactly what they struggled with and show exactly how you tweaked your design to fix it. |
| [Insert Example Image of User Testing/Feedback Here] | ||
|
4. Think About the Bigger Picture (Implications) |
Your digital project interacts with the real world, its rules, and its cultures. | Document how you handled copyright, privacy, and culture. If creating contemporary Māori digital art, write down how you ensured it was culturally appropriate. If building original 3D assets, explain the licensing rules you are applying. |
| [Insert Example Image of Cultural/Ethical Implications Here] | ||
|
5. Test Systematically (Data Integrity) |
Testing shouldn't be random trial and error; it needs to be planned. | Keep a clear testing log. Document how you checked for glitches, optimized file sizes, and ensured textures load properly. Keep your project folders tidy with clear file names (no "final_final_version3.blend"). |
| [Insert Example Image of Testing Log/Folder Structure Here] | ||
|
6. Be Honest in Your Reflection (Critical Analysis) |
At the end of the project, look back at your work with a highly critical eye. | Evaluate your whole process. What were the smartest decisions? What caused major headaches? If you had to do the exact same project all over again, what would you change about how you worked? |
| [Insert Example Image of Reflective Analysis Here] | ||
Documentation in Design and Visual Communication
| Key Element | The Goal | What to Do |
|---|---|---|
|
1. Show Your Design Journey Visually (Visual Evolution) |
Assessors want to see how your ideas grew and changed, not just the final product. | Use a clear sequence of pictures. Show how you went from quick hand sketches or basic 3D block-outs in Blender to fully detailed, textured designs. Let the images tell the story of how your design evolved. |
| [Insert Example Image for Visual Evolution Here] | ||
|
2. Keep Your Notes Short and Punchy (Annotations) |
DVC is all about visual communication. Assessors don't want to read massive essays. | Put short, sharp notes right next to your drawings or digital renders. If you used kitbashing to test different architectural layouts quickly, write a single sentence explaining why your final setup works best. Always answer "why did I do this?" |
| [Insert Example Image for Annotations Here] | ||
|
3. Design for the Real World (Context & Ergonomics) |
Your design has to actually work for real people and fit into physical spaces. | Use quick diagrams and sketches to show how you solved real problems. Show how your building fits on its specific site (handling the sun, wind, or slopes), or how a person's hands would comfortably hold the product you designed. |
| [Insert Example Image for Context & Ergonomics Here] | ||
|
4. Bring in Culture and History (Cultural Implications) |
Great design connects to the wider world and its history, not just what looks cool. | Show where your inspiration comes from visually. If your spatial design weaves in contemporary Māori visual art, storytelling, or tikanga, use visual research pages to clearly connect those cultural ideas directly to the shape and function of your final design. |
| [Insert Example Image for Cultural Implications Here] | ||
|
5. Follow the Rules for Technical Drawings (Drawing Conventions) |
If you are doing working drawings, you have to prove your design could actually be built by a contractor or manufacturer. | Make sure your CAD or instrumental drawings use standard New Zealand drawing conventions. Use the correct scales, line types, and proper hatching to show materials on your plans, elevations, and cross-sections. |
| [Insert Example Image for Technical Drawings Here] | ||
|
6. Curate Your Work (Quality Over Quantity) (Portfolio Curation) |
A messy, crammed portfolio hides your best ideas. | Be picky! You don't need to hand in every single doodle you did all year. Choose the visuals that best show off your smart design thinking, and arrange your pages so they are clean, spacious, and professional. Treat the layout of your portfolio like its own design project. |
| [Insert Example Image for Portfolio Curation Here] | ||