Rendering
Rendering
Rendering is the process of turning your 3D models and scenes into final images or animations. It’s where lighting, materials, and camera settings come together to create the look and feel of your project. You need to understand how to use rendering engines, set up lights, and tweak materials for realism or stylization.
For DT and DVC, rendering is critical for presenting your work. It’s not just about pressing “render”—it’s about making sure your scene communicates your intent, mood, and technical skill. Experiment with different render settings and learn how to optimize for quality and speed.
Rendering your Designs
We are learning to make videos of our designs
Rendering in Practice
Start in the file that has the designs that you want to render
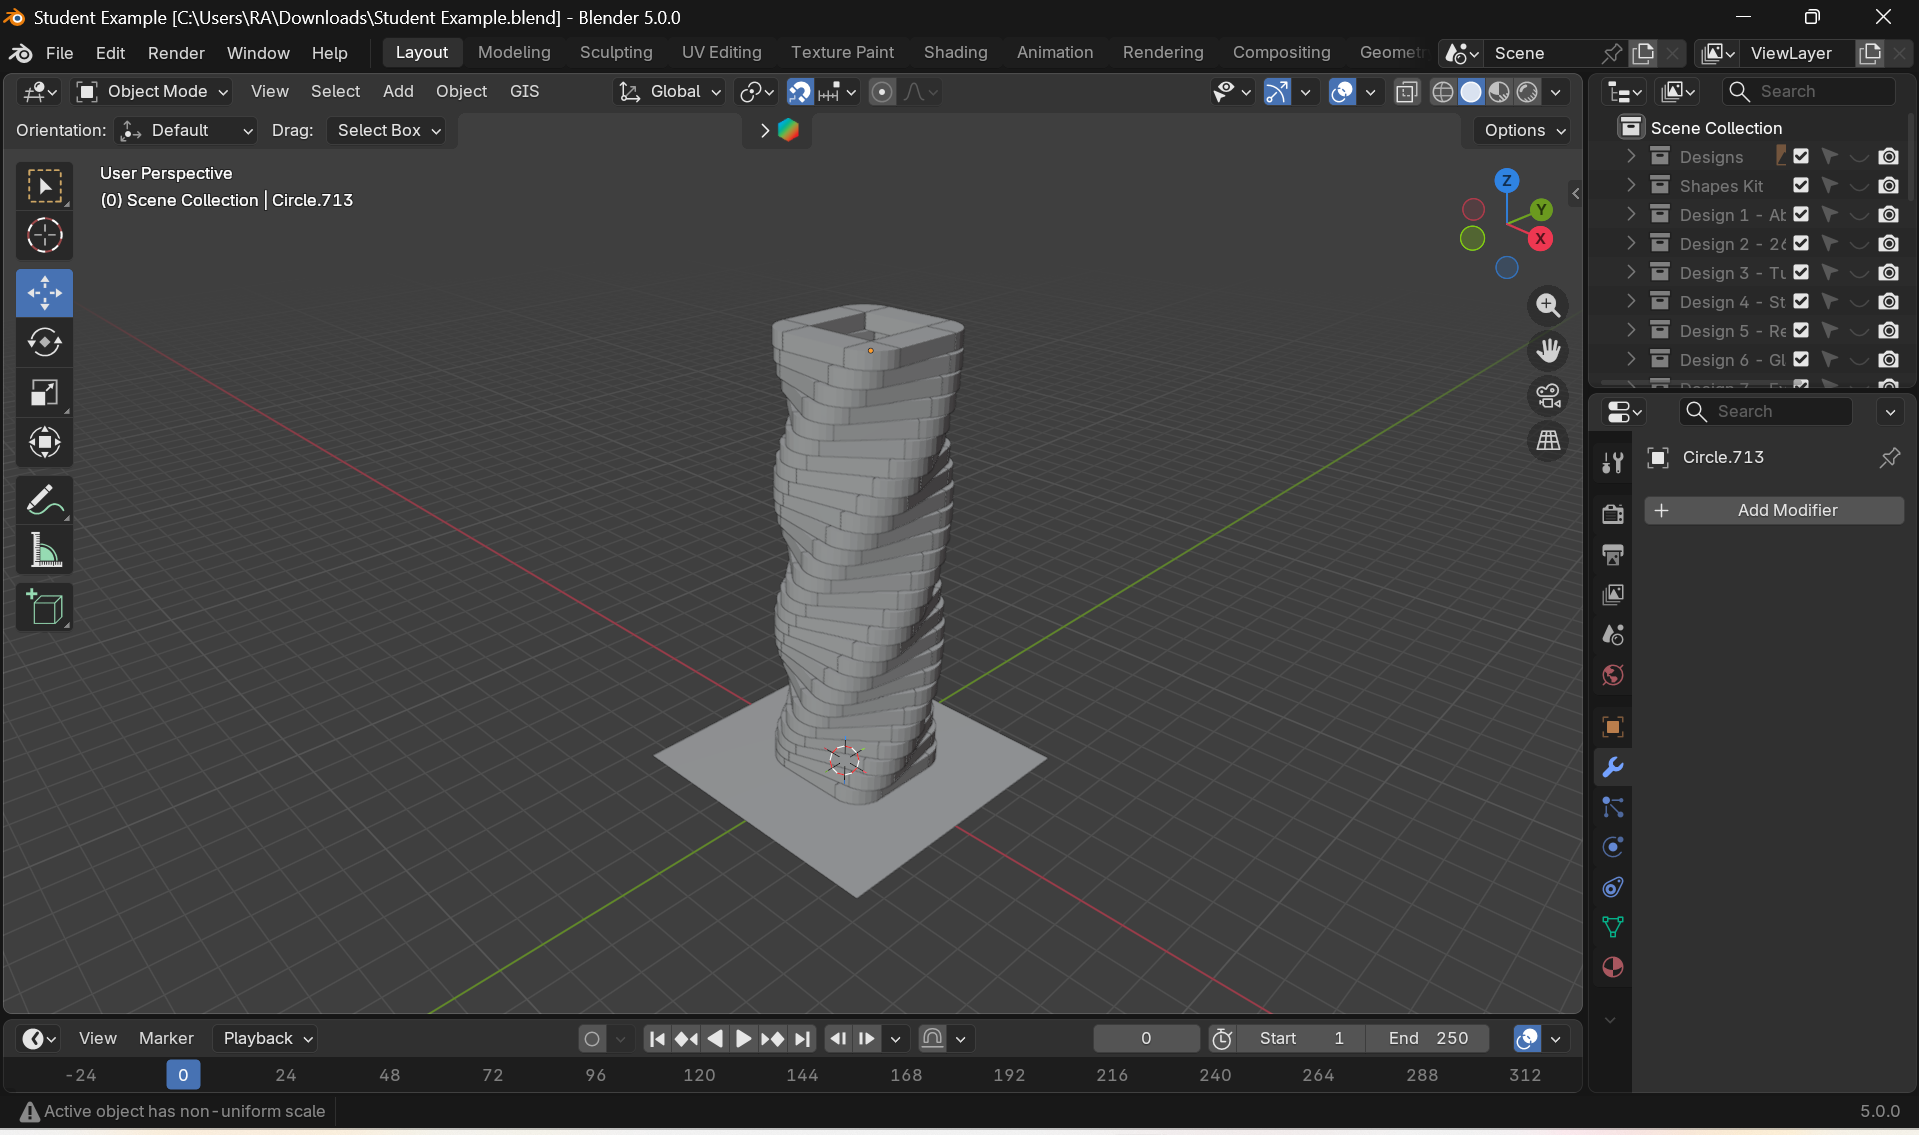
Make sure that all of your designs are organised
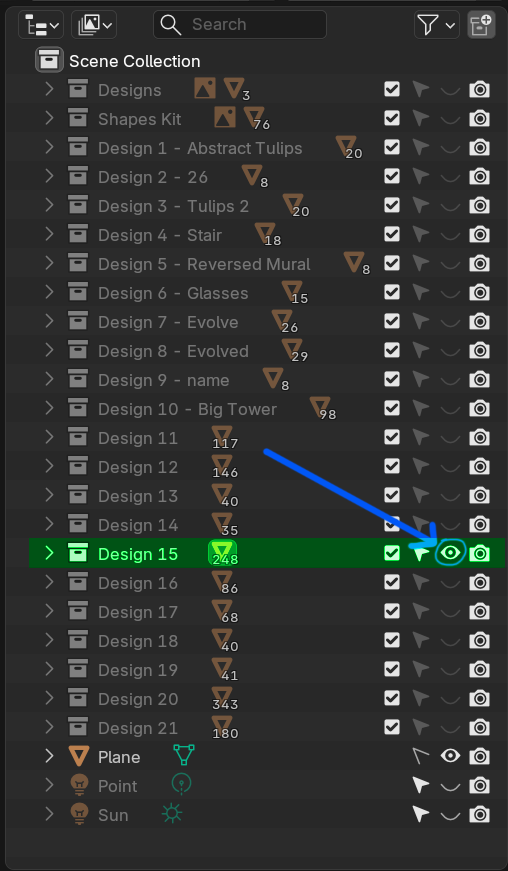
Use the "shift" key to select more than one object
Then use the "m" key to move objects into a new collection
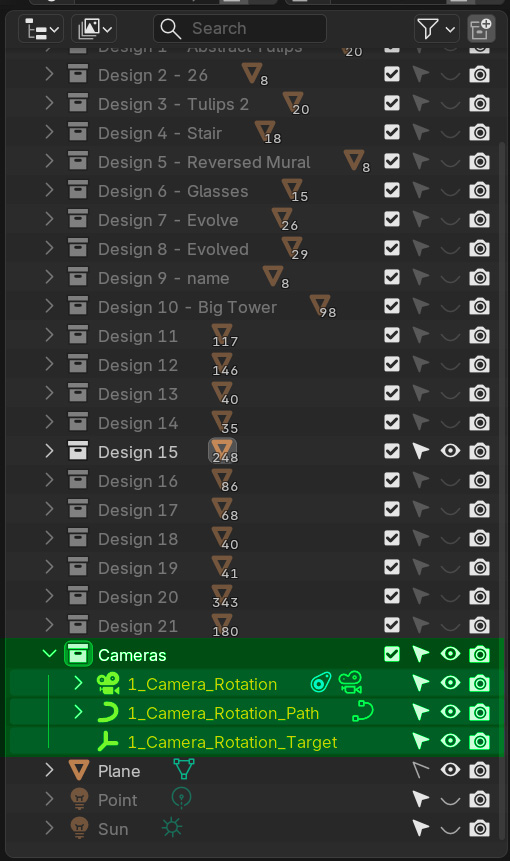
The example below shows a great way to organise your designs. Each design is in its own collection, which means that each one can be isolated and worked on individually, making it easier to manage and render them.
You can also see from the Outliner that the student was able to isolate just Design 15 by selecting the Eye Icon for that design only. By deselecting all of the other layers, only that layer will be visible.
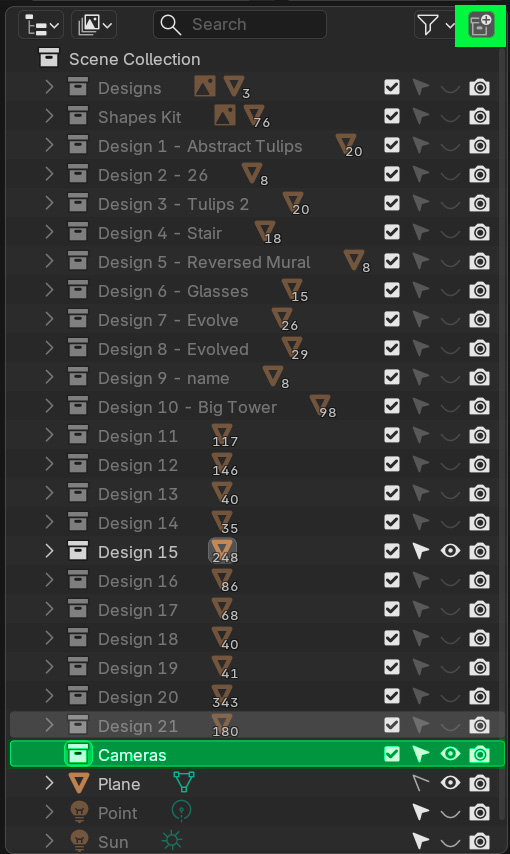
Create a new Collection
Press the "New Collection" Icon in the top right corner
Name the New Collection Cameras
Open the Camera Template file
1. Make sure that chose the right camera setup
2. Hold shift to select all of the objects
3. Then press cntrl+c to copy these files
Now go back to your Design Blender File
1. Use the cntrl+v key to paste the copied objects
Your Camera Setup should now be inside your Design Scene
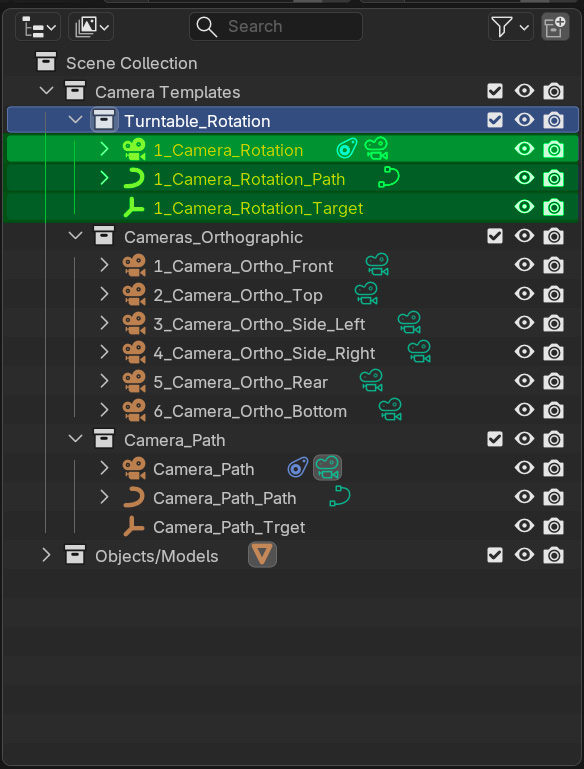
These are all of the parts of the Turntable Camera Setup
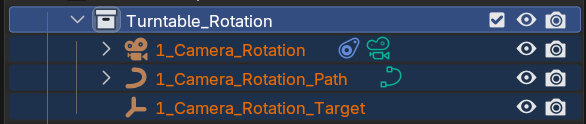

This is the Camera

This is the Path that the camera follows

This is the Target that the camera is looking at
Adjust the Camera
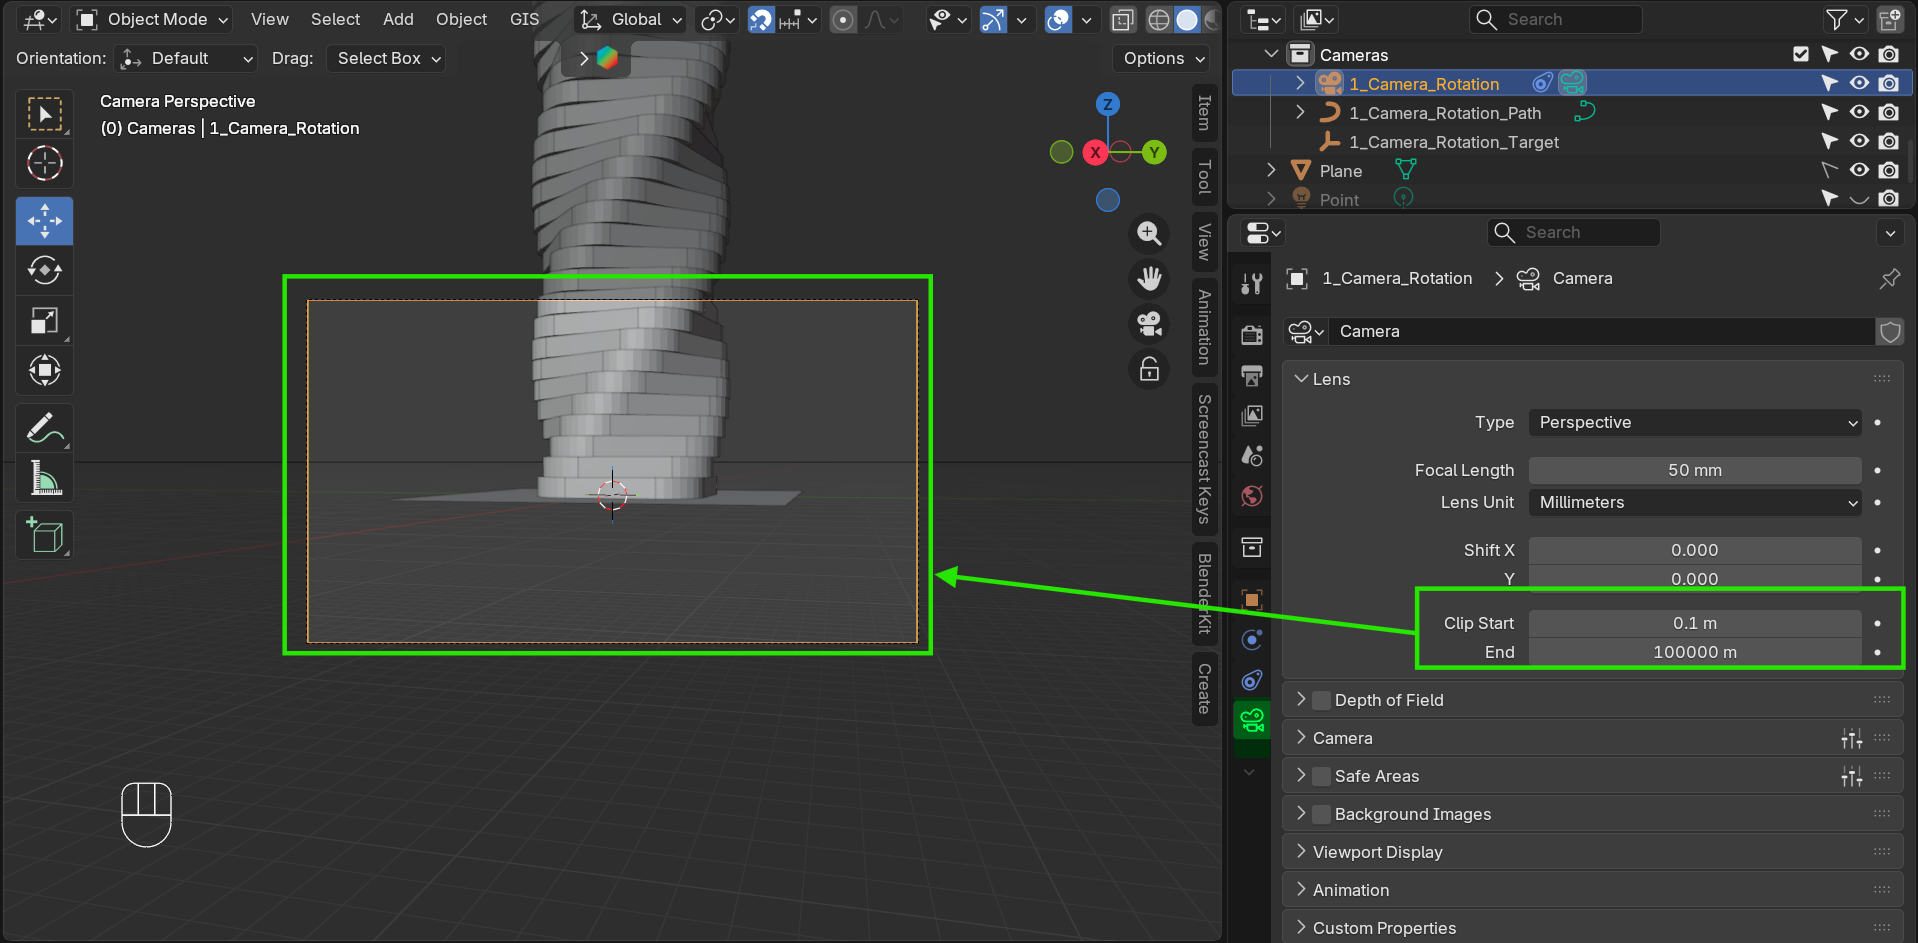
1. Select the camera in the Outliner
2. Select the camera icon in the Properties Panel
3. Make the Clip End value a large number
By doing this you will be able to see objects that are far away from the camera
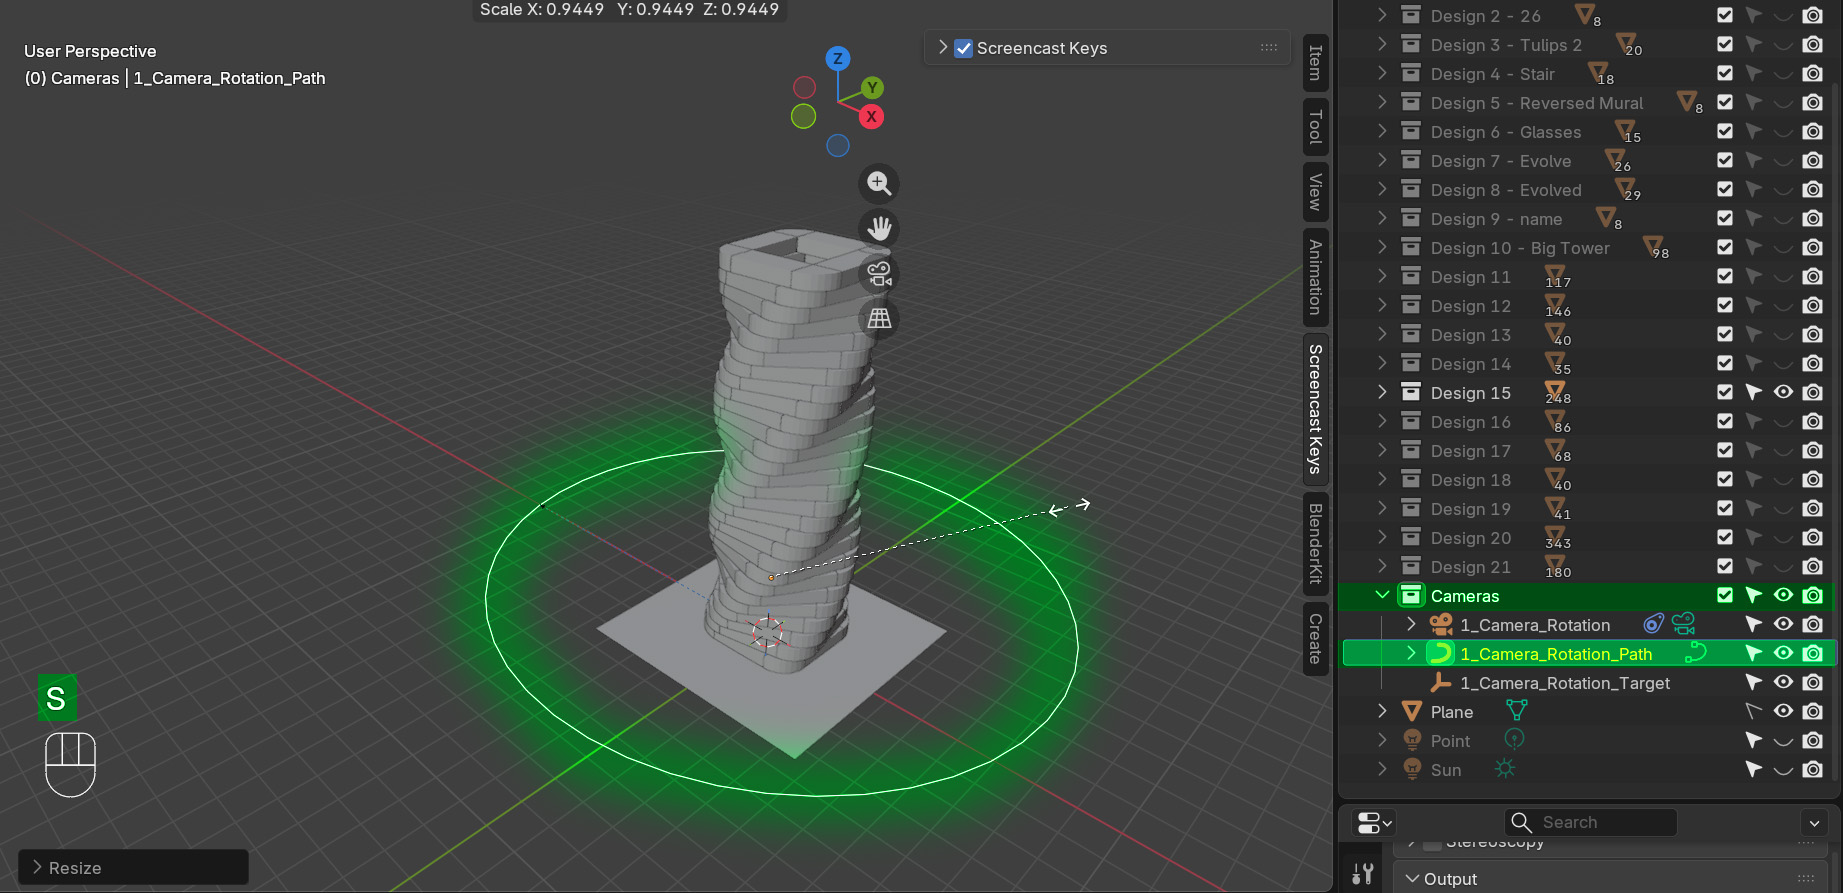
Adjust the Path Object
1. By clicking on the Path, you can change its, height and radius so that you can see all of the object
2. Use the "s" key to scale the path, and make the camera farther away or closer to the object
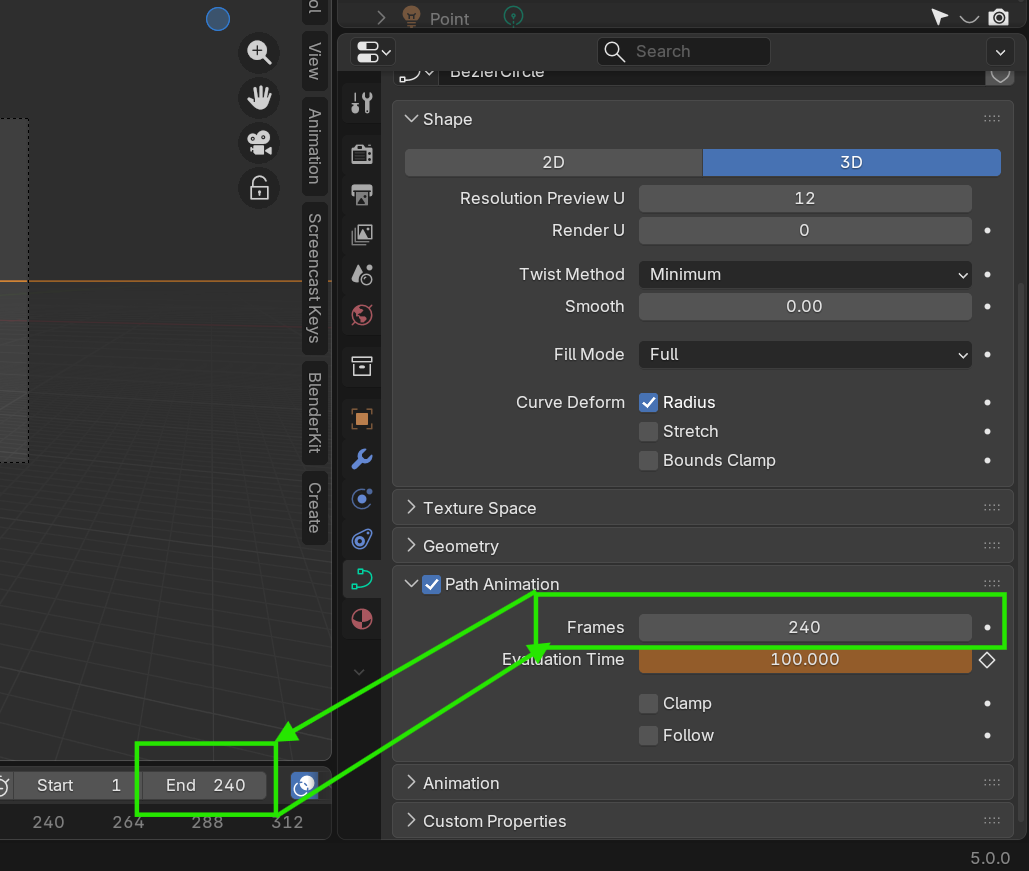
Adjust the length of the animation
1. Select the animation in the Timeline
2. Make the animation the same as the Frames in the path animation
3. This will make the rotation match the path animation, so that the animation loops perfectly
4. 240 frames = 10 seconds (assuming 24 frames per second)
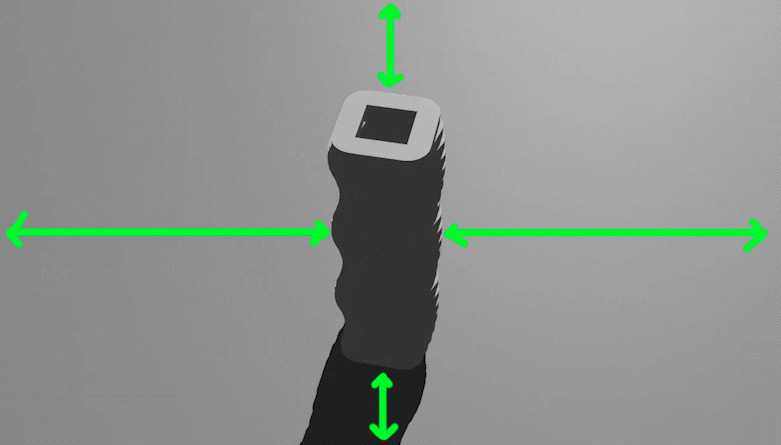
Adjust the Target
You can move the target up or down, side to side, this will help to center the object in the frame
You should try to center the object in the frame so that the distance from all sides is equal
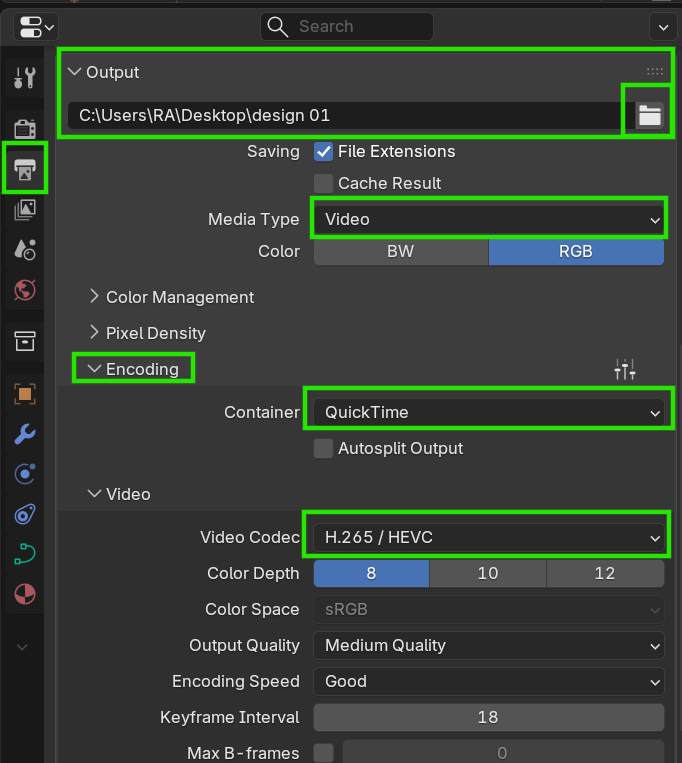
Before you Render - Make sure to set these settings
1. Make sure that you set the save location of your file
2. Choose the appropriate file format for your render
3. Chose Media Type to Video
4. Set Encoding to QuickTime
5. Set the Video Codec to H.265/HEVC